 Image by Pinot & Dita via Flickr

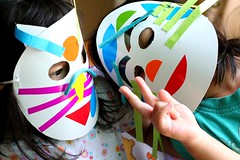
Make your own papier mache masks.
Before you get started, tear up a bunch of brown craft paper into small pieces. Don't cut the paper, just tear it so the edges are ragged and somewhat uneven.
Mix 50% craft glue to 50% water.
Take some basic measurements of your upper face. Measure from temple to temple and from mid forehead to mid cheek. Measure the distance from temple to outer eye and from the inside of one eye, across the nose bridge to the inside of the other eye. Using your measurements, draw your mask onto a piece of sturdy but flexible paper, the brown craft paper will work.
Cut out your design and make sure it 'fits' your face, that your eye holes are accurate, that the mask extends from side to side and top to bottom as you planned. Once your mask template is just right, begin to build up the layers. Dip each piece of torn paper into the glue/ water mixture and cover your template with the pieces, overlap each piece for secure bondage. This is going to take a bit as you will need to build up a number of layers, on both sides of the template. Make sure you are hand forming the mask, unless you don't mind if it lays flat.
Once all of the layers are in place and dried and your mask is shaped as you want it, brush on several layers of art gesso. When the gesso has dried, you can paint your mask, add feathers or whatever.
![Reblog this post [with Zemanta]](http://img.zemanta.com/reblog_e.png?x-id=01629b2f-a8f7-4480-8410-15b9a7f5a2dc)


.jpg)
No comments:
Post a Comment